
We stripped the roof, laid down some ice and water shield, felt roofing and new 25 year shingles.
What a great weekend! No one got hurt, the roof installation went great and looks fantastic. We also picked up the material to finish the slats on the rear absorption panel.
quick update and onward!
(oh the Mac-Haydn Theater wants me in a production of State Fair in August...I'll finish my studio eventually! WEEE!)
Monday, June 18, 2012

Friday, June 15, 2012
Studio Build 20
This is a quick update. No pictures yet because it just doesn't look like much got done, BUT IT DID.
The second ceiling cloud is up, and having TWO people to hang it was a lot easier than me swinging it up there myself. (Thank you Cathy!)
Also the back wall sound absorption panel is up, and most of the space array slats are cut. They are pieces of 2x4 that are ripped down to 1 7/8, 1 1/2 and 1 1/8 of an inch and spaced an inch and a half apart. In a repeating pattern to cover the entire panel.
I'll lightly sand the ripped pieces, then stain them a cherry red. Right now the room is so full of burlap brown that it needs splashes of color.
More work this weekend, (I have roof project to do first though) and pictures will be coming. We're on the home stretch!
The second ceiling cloud is up, and having TWO people to hang it was a lot easier than me swinging it up there myself. (Thank you Cathy!)
Also the back wall sound absorption panel is up, and most of the space array slats are cut. They are pieces of 2x4 that are ripped down to 1 7/8, 1 1/2 and 1 1/8 of an inch and spaced an inch and a half apart. In a repeating pattern to cover the entire panel.
I'll lightly sand the ripped pieces, then stain them a cherry red. Right now the room is so full of burlap brown that it needs splashes of color.
More work this weekend, (I have roof project to do first though) and pictures will be coming. We're on the home stretch!
Tuesday, June 5, 2012
Diversion!
Ok, I've been doing a lot of video editing, and while things load, render, render, load, transfer....
I have some time on my hands.
So I built a Lightsaber.

See the full Instructable here
I think it came out pretty badass, and will find a home in the new studio!
I have some time on my hands.
So I built a Lightsaber.
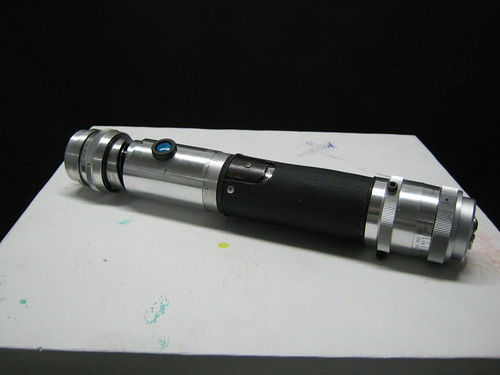
See the full Instructable here
I think it came out pretty badass, and will find a home in the new studio!
Monday, June 4, 2012
Studio Build 19
Oy, between rehearsals for this, commencement for that, reunion for them...
and installing a fence in the back yard to keep Bumbles from bothering poor little Peaches..
Back to work!
So the ceiling clouds are hung on hooks with eye bolts threaded into the joists. Which in itself was a lot of fun as the ceiling joists in this room run two different directions due to the house design. So finding the one joist, then locating the perpendicular joists, while keeping the measurements together so that the hooks line up. Joy!
The hooks go through the back support, and through the insulation. The cloud doesn't weigh too much.

Here is the back of the cloud prior to hanging.

I hung it by myself.. that was FUN! (not) But here is the first one up and done.

Very satisfying... during the day, while I'm waiting for things to render on one computer... I've been playing with some junk on the workbench. I have to admit. I'm a geek. I'm building a lightsaber.
http://www.therpf.com/f9/trashsaber-149679/

and installing a fence in the back yard to keep Bumbles from bothering poor little Peaches..
Back to work!
So the ceiling clouds are hung on hooks with eye bolts threaded into the joists. Which in itself was a lot of fun as the ceiling joists in this room run two different directions due to the house design. So finding the one joist, then locating the perpendicular joists, while keeping the measurements together so that the hooks line up. Joy!
The hooks go through the back support, and through the insulation. The cloud doesn't weigh too much.
Here is the back of the cloud prior to hanging.
I hung it by myself.. that was FUN! (not) But here is the first one up and done.
Very satisfying... during the day, while I'm waiting for things to render on one computer... I've been playing with some junk on the workbench. I have to admit. I'm a geek. I'm building a lightsaber.
http://www.therpf.com/f9/trashsaber-149679/
Monday, May 21, 2012
Studio Build 18
On Sunday I built the two ceiling clouds, they are stacked on the floor...
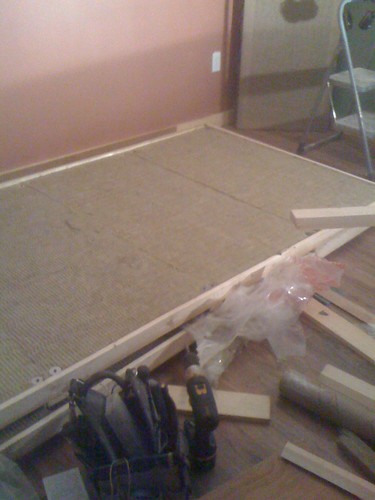
I'll cover them with burlap tonight and get them hung.
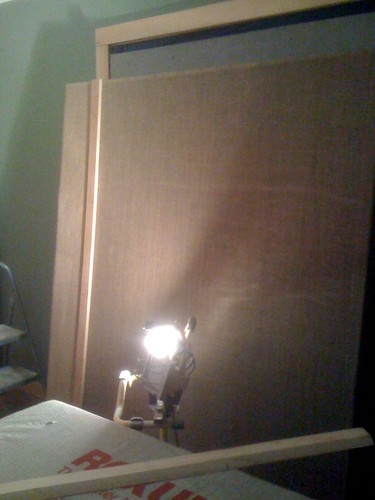
Then I created a panel to cover the ugly window plug. The Burlap is only 5 foot wide, so there's a strip to cover the seam. It kind of looks like modern art. I think I'll stain that strip a nice deep cherry red.
and then the large piece that will cover the back wall. This is the rough frame with insulation. It still needs the screws and washers to keep the insulation in place when moving things about.
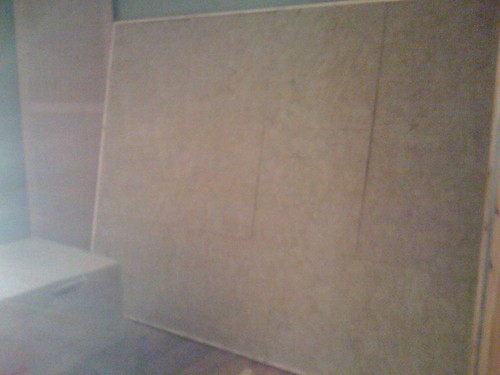
Which will get covered with fabric and then a series of 1/2" pieces of wood to create a sort of space array. Like this...

So the room is shaping up to look like this,
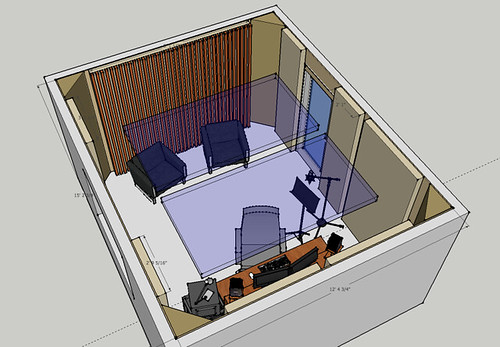
Closer and closer! And already with pieces in place the room sounds great!
Saturday, May 12, 2012
Studio Build 17

 Some more details with the frame building, these are the washers and screws to make sure the insulation doesn't fall out.
and then how I use push-pins to hold the print while I line it up and make sure there are no puckers.
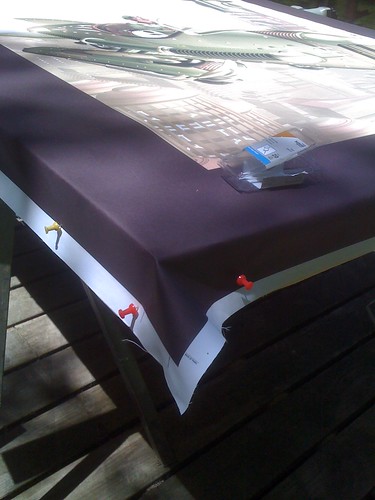
Then around the edge with staples. I have to admit, having the right tools, no matter what you're doing, is a wonderful thing... (that also means gear! good pro microphone, decent software...)
Here is the wall portion of the french cleat, it makes it real easy to hang these things, and once they're up, it feels solid.
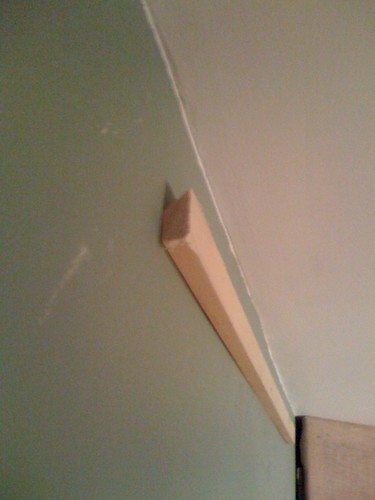
And finally, the whole thing mounted and hung on the wall.

I have to run to a rehearsal for a library benefit, and it's such a beautiful day, that requires a motorcycle ride, and that requires taking the long way, so that required me to clean up early... :) I'll get more done tomorrow after having lunch with Mum.
Have a happy Mother's Day one and all!
Tuesday, May 8, 2012
Studio Build 16
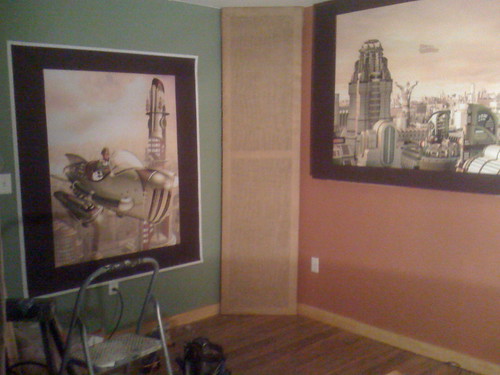
So work was catch as you can. But I did get the frame for the large panel behind the mix desk built! This one will get covered with an art print that I had ATS Acoustics print out at 4'x8'.
Here you can see the panel and how the 24"x48" Roxul fits in.

and here is a detail of how the frame is assembled, complete with "french cleat" on the back.

and back to one of Mike's images for clarification:
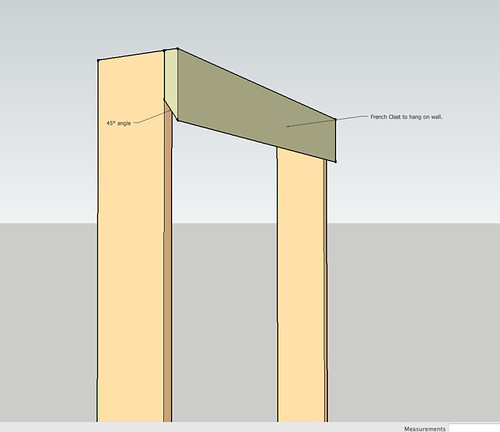
Then I secured the insulation to the cleat and a bottom brace by running a screw through the insulation and with a washer to keep it from pulling through. I forgot to take a picture, but I'll get one that clarifies.
From there, stretch the fabric over the frame and hold in place temporarily with push pins until I got it right. Then pneumatic staples all around the edge. The other half of the French cleat is mounted on the wall, 5" from the ceiling and catches the 45 degree angle perfectly for a solid mount.

and there it is! This is what I'll be above the monitors and behind the
nearfields. And this print will get mounted the same way to the left
of the mix desk. The images are the work of Bradley W. Schenck from his Retropolis series. Way cool stuff, and the vibe I was hoping for.
That will be Thursday evening at the earliest, maybe Wednesday, we'll see. Then a couple of more panels, a door latch, rug, and we can think about moving some gear in!
WOO!
Subscribe to:
Posts (Atom)


