
I was on my way south from L.A. after FaffCon4 and the thought occurred to me, I like being a hero. I like helping people, using my skills, no matter how mundane or silly to solve a problem or give someone a hand. Helping other really makes me happy.
Being a hero doesn't take much when you think about it. I don't have xray vision... although, ya have to admit, that would be cool. I can't fly without an airplane, neither could Batman. I'm strong and can lift things but a school bus is out of the question without a forklift. But if you need a hand carrying something, let me get that for you. Need a ride downtown? sure! Do you have any ideas on how to fix this? Let me look.
I can't help it, I have an overwhelming desire to see others succeed. I hold open doors, say bless you when people sneeze and offer people a pen if they need one.
I carry this mentality into my working life. Doing voice work or giving it my all on stage. It all follows the same idea, helping someone out with one of my talents. That can be a client or someone who needs a hand moving to a new apartment or fixing a bike.
Modern technology has even give us the Dick Tracy style phone. I can be reached anywhere and almost anytime by people. I need to work on a logo or a battle cry! "Spoon!!" is already taken, (damn you Tick!)
I like it. How can I help?
Ok, preaching over, back to work on the studio, but I wanted to share the idea...
Friday, March 30, 2012
Tuesday, March 20, 2012
Studio Build 8
Calculating the door dimensions.
There's a bit of detail missing from books about how to physically build the door, so I figured I would give some insight as to my process.
It started with the door. It's a steel door with fixed dimensions. Since I was framing out the space in which it would live, I could work from the door out. Verses trying to squeeze a door into a pre-existing space.
So, lets work with a hypothetical door and walk through the dimensions I chose. The door is 36" wide, I want a gap on both sides of 3/16", then a heavy duty frame of dimensional lumber which is 1.5" thick then a 1/4" gap on both sides.
so from the door, we have 36+(3/16+3/16)+(1.5+1.5)+(1/4+1/4) and doing some addition we come up with 36+3/4+3+1/2= 39 1/4 for a rough opening. so as long as the world is perfectly plumb and wonderful, that would work. I gave myself an additional 1/4 inch for breathing room So I framed out my rough opening to be 39 1/2" wide.
Easy right?
Now for the height there were a few things to figure. The room just had a raw plywood subfloor. I have some leftover floating floor from the living room project. So I needed to calculate how high off the floor I wanted things and still end up with a tight seal on the threshold.
Here's what I drew up.
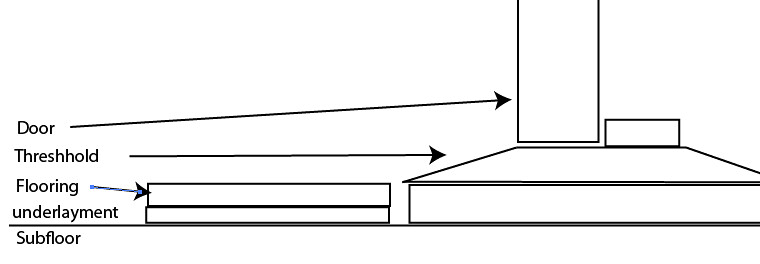
So from the subfloor working up. We have underlayment felt that is 1/8" thick, flooring that is 1/4" thick, a 1/2" threshold and a door gap of 3/16". Then the door, another 3/16" gap, a 1.5" top door frame then a 1/4" gap between the door frame and the roughed out wall framing.
The floating floor will not be physically joined to the spacer under the threshold, a small bead of silent seal will act as a cushion. It will have some movement as people walk on the floor but for me the main priority was that it wasn't going to transmit vibrations from the other side of the door. The caulk will be hidden from view as the flooring will tuck under the threshold.
The door will also have a drop seal installed, so once it closes, there will be two seals on the bottom of the door and then the seals around the edges.
Sunday, March 18, 2012
Studio Build 7
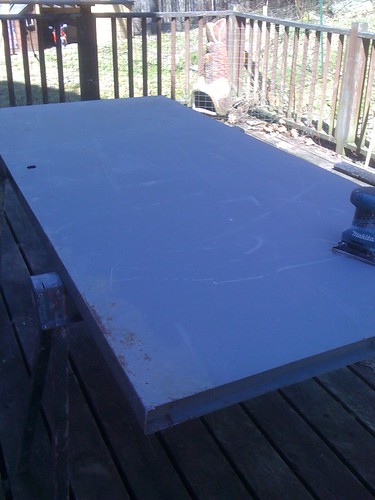
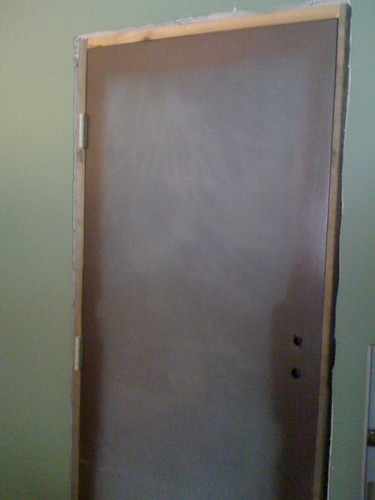
Wonderful weather! it's time to get the big scary door built. The studio door can make or break a space. It has to be solid, and have an tight seal. So I started out with a salvaged fire door.
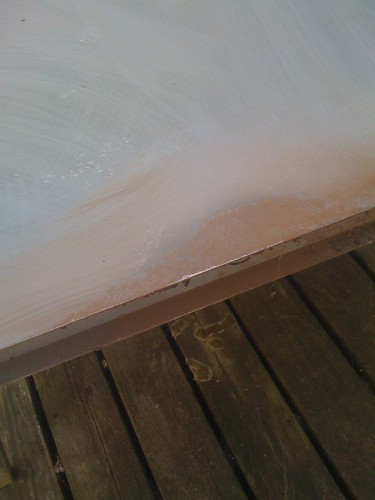
 It had been sitting in a barn for a couple of decades, and had some surface rust. So I hit the rusty areas with the palm sander and some 80 grit paper. Then wiped down the surface with some paint thinner.
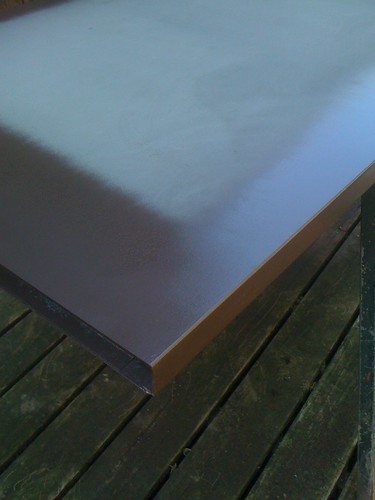
 There will be a panen of 3/4 inch cabinet grade plywood added to the door, to create another layer to seal against, so I painted all of the edges with Rustoleum Hammer finish in a dark bronze and painted only an inch or two into the face of the door.

The hinges are heavy duty commercial hinges from McMaster Carr, and what's cool is that the bolt pattern matches perfectly with the fire door! and the screws fit perfectly as well! WOOO! love industry standards!
The hinge side of the door frame is 6x2 routed out to accept the hinges.

Then with the help of my wife Cathy, we muscled that bad boy into place with a 1/4" gap on either side. That gap will be stuffed with some felt then caulked with some SilentSeal before the trim goes up.
 This is the inner face of the door, it will get a coat of green glue, an sheet of Luan and then stained. Next up is finishing the threshold, the drop seal and making the jam/gasket/jam/gasket combination. But with the door hung and in place, that should be a breeze!
Stay tuned...
The hinges are heavy duty commercial hinges from McMaster Carr, and what's cool is that the bolt pattern matches perfectly with the fire door! and the screws fit perfectly as well! WOOO! love industry standards!
The hinge side of the door frame is 6x2 routed out to accept the hinges.

Then with the help of my wife Cathy, we muscled that bad boy into place with a 1/4" gap on either side. That gap will be stuffed with some felt then caulked with some SilentSeal before the trim goes up.
Stay tuned...
Tuesday, March 6, 2012
Studio Build 6
Why do these things take so long! I've said it in other stories that I have written and even in a few sermons that I delivered. Life happens. I wanted this to be done by the end of January... ok, February... sheesh here it is March and I'm just finishing painting!
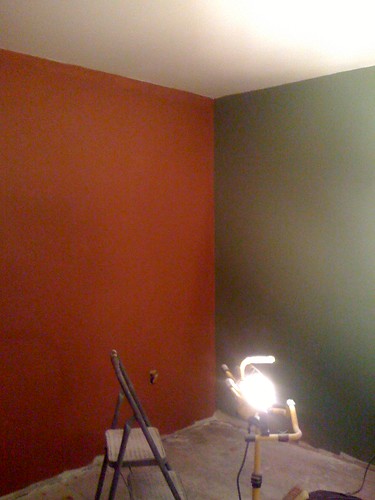
Walls and ceiling are painted! it's not the best drywall work in the world, there's little areas here and there if you look close. So don't look. A good friend of mine, Michael Nathan (of Nathan Sports) told me that he wouldn't hire an A+ type. They're never satisfied and take forever to get things done. He would rather the B student. Good job, turned in on time.
Get it done.
So here are the colors of the studio. The red wall is where the mix console is going.

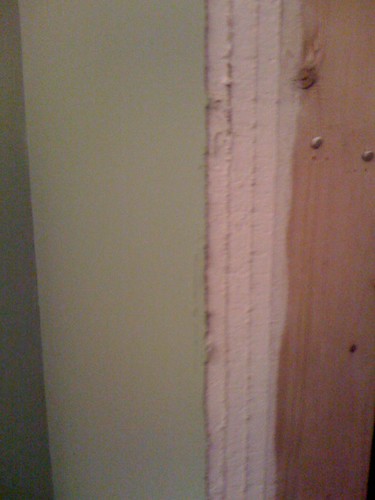
and here is a quick shot of the mass that is three layers of drywall.

I have to touch up a few paint spots but then I can clean up the drywall mess and paint mess and bring in the material to build the door.
Once the door is built, the floor goes in. Once the floor is in, the trim can happen. Once the trim happens the acoustic panels get built and hung. Once the panels are hung, we move in gear and get busy!
Walls and ceiling are painted! it's not the best drywall work in the world, there's little areas here and there if you look close. So don't look. A good friend of mine, Michael Nathan (of Nathan Sports) told me that he wouldn't hire an A+ type. They're never satisfied and take forever to get things done. He would rather the B student. Good job, turned in on time.
Get it done.
So here are the colors of the studio. The red wall is where the mix console is going.
and here is a quick shot of the mass that is three layers of drywall.
I have to touch up a few paint spots but then I can clean up the drywall mess and paint mess and bring in the material to build the door.
Once the door is built, the floor goes in. Once the floor is in, the trim can happen. Once the trim happens the acoustic panels get built and hung. Once the panels are hung, we move in gear and get busy!
Subscribe to:
Posts (Atom)