Monday, October 22, 2012

Studio Build 27

The Door.

Work on the door had stagnated as other projects took priority, but I caught a sale on cooler door latches and ordered my Kason 58 latch and assembly!

picture of latch, but mine doesn't have the tall catch, mine is "flush"


Now to finish skinning the interior of the door! The plan was to keep with the theme of retropolis and incorporate the latch with the motif. So I drew out a rocket. (sorry, more spacejunk)

Off to the Hardware Store!

I picked up one sheet of maple luan. I cut it down to 34x86 first.


Then I drew out what would be the hull of the ship on the leftover material and layered over the first sheet.


It's kind of tough to see but it's there. From there I cut out a "Hatch" and a porthole. Typical 40's drawing of a rocket ship. I then drew and cut the fin from the first layer of luan. Here it is roughed onto the door with some screws holding it in place. The panels are bonded with adhesive caulk to the door as well.


Once all screwed in, it will be stained dark to match the door. The pattern will be there, but it won't be so bold. Just a subtle (or not so subtle) hint of a rocket. 

Still more to do

Once the latch is installed, I can finish the door seals, there's one seal installed, two more to go to really tighten up the big hole in the wall called a door.

More on Friday, as this week is packed with rehearsals, performances and helping out other VO talent! WOO!

Thursday, October 18, 2012

Tackling the Woodpile

When I worked with musicians on a daily basis, they would often use a phrase, "I'm going to have to woodshed this." Basically meaning they head out to the woodshed and practice a piece till they got it right. They wouldn't come out till they nailed it.

But when I talk about tackling the woodpile, I'm thinking of how we handle 6 cords of wood dumped in the driveway. Three large dumptruck full piles of split wood for the winter.

This is just four cords... 
If you look at this huge pile of wood, it's enough to make your back hurt. It is enough wood for an entire winter, plus some extra.

Every day, progress.

Each morning, for 15 minutes to half an hour we bite into this chaos and create order as we stack the wood into the woodshed. It may only be six or seven wheelbarrow loads a morning, but it is progress. Babysteps toward the end goal. The woodshed is getting full and the piles are getting smaller with the goal of getting everything stacked before snow flies.

Digging frozen wood out of the ice and snow is a real drag.

Ok, you have a fireplace and wood.  So what?

Well obviously this isn't a blog about long cold Upstate New York winters, but it is a blog about voice work and my home studio.

It's the same mentality though. Don't look at the whole pile of work to be done or you'll never start. You'll grab some hot cocoa or a glass of malbec and call it a day. Just do one thing to move you forward each day.

It's the same old story you've heard before, "The journey of a thousand miles begins with one step." But for me, if I think about the whole journey, there's no way I have the energy to take that step. The thought of tackling the Appalachian Trail seems overwhelming to me, however taking a few steps down to the path, well, that doesn't seem too hard.

Nibble Nibble like a Mouse

Each day I move my business forward, it can be the simplest thing; write a blog post, email a past client, create a list of people to send marketing material too, do an audition or two.  Simple small things that move me forward. At the end of the month or the end of the year, I can see how far I've traveled!

One of the great things like an Un-Conference like FaffCon is that it gives you goals and also gives you the chance to look back at what you've accomplished since the last FaffCon. For me it's been the creation of this great studio space as well as doing more and more work and keeping busy. Tiny nibbles each and every day.

I hope that isn't too cheesy.  (Mouse pun intended...)

Tuesday, October 16, 2012

Distilling FaffCon5!

There's a phrase that I've used in the past, "Education with a firehose!" so much comes at you, so fast that it takes a moment or two to recover.

FaffCon5 did not disappoint!  The Omni Hotel in Charlotte did not disappoint either!  I'm a new big fan of the Omni Experience.

The Connections

Right from arrival and the shouts of "MONK!" and the hugs and the handshakes it was off and running.  Amy Snively (rhymes with LIVELY!) is the ringmaster that knows how to run the show.  Registration was flawless, organization was flawless, everything was perfect.  Really.  If there were any hiccups, none of us civilians knew about it!

The networking starts right out of the gate and the work starts that evening.

Details

Ok, I can't give all the details away here, "What happens at FaffCon, stays at FaffCon." but let me say this, there was no such thing as a dumb question or a secret.  If you needed to know something, you asked and people told you their techniques and tricks.  Ego's are left at the door.

I offered a session on home studio construction, why?  Um... read my blog, you'll see why.  And I'll share any advice or bump I've discovered along the way.  Anything I can do to help out someone in need.  I can't help it.

From there I took in sessions taught by people that are actively working and surviving in the wild waters of Voice Acting.  I met with producers, agents and other talent that have streamlined their business to the point of über efficiency!  If you haven't met Tom Dheere, then you don't know efficient you can truly be.

Just meeting and talking with Jeffery Kafer changed my life and workflow.  My conversation with him about outsourcing my QA and editing was blew my mind.  I walked away going, "Duh, that makes perfect sense!  Why doesn't everyone listen to Jeff?"

More!

Are you getting the idea?  Everyone I bumped into, old friends, new friends was a learning experience.  One person asked me, "Why do you market to other VO talent?" since I gave away mugs with my "mug" and contact information on it.  My response was simple, I see everyone as a potential contact.  You never know who may need a hand or something.  It may not be to hire me, but it may be to ask a question or advice.  And hopefully they won't forget my "mug!"

Doug Turkel, Debbie Irwin, Cliff Zellman, Ok, I have to stop, EVERYONE I spoke to, for even a brief moment was gold.  Seriously.  People share amazing information.

Summary

The next FaffCon will be next fall in San Antonio Texas, I'm hoping at an Omni hotel!  I haven't seen San Antonio since I left basic training at Lackland AFB, so I'm looking forward to visiting again. 

I'm still filtering all the information from FaffCon5 and I have some goals to reach before FaffCon6, so I'm going to GET BUSY!


Sunday, October 7, 2012

Studio Build 26

Ah the joy of wiring!

There's something cathartic about running wires and cables. A fresh clean installation with everything running neatly from here to there. Joy joy joy!

We moved gear in last week, and have been busy with other work so getting things rigged up has taken a few extra days.  I was literally behind the mix desk last Sunday, when the phone rang and I had to hustle over the Ghent Playhouse to help with an issue. From there other projects took over for the day.  (Dishes, dinner, etc.)

But today we grabbed a box of cables and wires and got busy!

Dang, they're loud...

I salvaged a couple of APC Powerstack 250's with the intention they would be my power filters and battery backups. I ordered new batteries for them and loaded them into the mix desk rack. They look pretty sweet and fired right up. AND THEY ARE LOUD!

Seriously, 35db at a meter away. Nope, no sir, uh-uh, ain't happening. I didn't work so hard to get a quiet space to introduce two of these noisy beasts to my space. Out they go. They belong in an electrical closet humming away like that. I don't know where I'll use them, but they are going to be replaced by a set of Furman power filters. And those are going to be ordered tonight!

Back to wiring

Ok, so we're creating a short list of needs, longer VGA cables and a few other odds and ends with the goal of really getting things neat and quiet. I'm still in the market for a touch screen which will replace my music stand for copy. The touch feature will allow me to hit record and also move the text as I read. I'll keep you posted on that.

I have some Furman's to order and FaffCon5 is this coming weekend!

I love this life.

Sunday, September 30, 2012

Faffing about at FaffCon 5

What is a FaffCon and why should a voice talent be there?

I've always known the phrase, "Faffing about" as basically goofing off. Doing something just to kill time, basically getting nothing done while on the clock.

So when you hear about a conference called FaffCon, images of a wasted weekend in some dull hotel conference room, come to mind. People milling about talking about things that just don't matter, I.E. Mac vs PC, Ford vs Chevy, political or philosophical blather or the Chicago Cubs. Perhaps even a lot of "I did this." Or "Me, me, me."

Why FaffCon was named what it is escapes me, for those visions of wasted time are the furthest from the truth. 

Plan to be there

My first FaffCon was FaffCon3 in Hershey Pennsylvania. I drove down from upstate NY to meet people I had only texted with on some random forum called the VO-BB, a voice over bullitin board. A place where knowledge of the wild and wooly world of voice work can be openly discussed and information is shared freely. 

I drove to the hotel, checked in, and made my way down to a restaurant to find these "Faffers". I sat at a table with friendly faces and the magic began. I sat with Chuck Davis and his wife and so the introductions began. The large room grew smaller as I began to connect names and faces.  Smiles, handshakes and revelry. And that was just the dinner before the actual conference began.

An Un-Conference

FaffCon is an "un-conference" with all of it's organization, it's planned chaos. There may be one planned event, a guest producer or casting agent, but the rest is up to those who are in the room. Amy Snively (rhymes with Lively!) gathers us into a circle and asks what we want to know and people who do know volunteer to lead a meeting on that subject.  Ego's are left at the door. 

Amy Snively ROCKS!

If you can help someone, you help. If you need to know how to get yourself to the next level, ask and someone helps. It's that easy. The wall fills up with classes that you can jump in on, and if you find out several minutes into the conversation that it's not for you, bug out and 'bee' somewhere else. The time is yours, gather as much as you can from people who know. No faffing about.

Plan to be there: Take Two

FaffCon has happened all over the country so far. I caught my first on in Pennsylvania, then the next in San Diego. This year is in Charlotte North Carolina. Now, it's too late for this year for you to get in unless you were one of the lucky 100 that signed up in the first few hours of availability. Sold out in seven hours, that's how amazing it is. So why am I rubbing this in? I want you at the next one. 

Seriously, if you have been working as a voice talent and want to know more, learn more or help others get to where you're at, you need to start planning now. FaffCon used to be twice a year, a Spring session and then in the Fall. Now we're being weened to once a year. The next conference is next October, I don't know where yet, we'll find out soon, and you may think that you have a year to think about it, but you need to get that goal on the calendar now. 

But why! why! why? for the love of Mike WHY!?

I'm goal driven. Give me a goal or a challenge and it's game on. My goal from FaffCon3 was to get my studio built. No longer would I be standing in the den waiting for the dog to stop chewing on a toy. I would have a professional space. If you read through my blog, you'll see the work and progress of that. At FaffCon4 I shared my experience with others about building their own space, it's not Rocket Surgery, and if you have some skills you can get it done. It's a good goal. Also at FaffCon4 I learned a lot more about marketing, using that knowledge, I've increased my business almost by a factor of 2. The gigs are better paying and more frequent. I learned how at FaffCon.

At FaffCon5 I'm hoping to learn and teach again. It's education with a firehose. Take notes, take names, kick your butt. People come from all over the world to learn and share. People who know the world of V.O. People who are willing to share dark secrets of the art. I can't wait.

Fellow Faffers!


Tuesday, September 18, 2012

Studio Build 25

Back to work!

It has been a great Summer of theater.  Merry Wives of Windsor at the Helderberg Theater Festival was a great success. The role of Falstaff won me my first TANYS (Theater Association of New York State) award for excellence in acting. Then from there I jumped right onto the Mac-Haydn Stage to play several character roles in State Fair.

Now that that's all wrapped up, we got back to THE STUDIO!

On Sunday we were able to tap into the return plenum of the air system and we dropped in a new 12"x4" return duct from the studio for airflow. The room already had a feed for heat and AC, but with the door closed, it had nowhere to go. 

The return is located right behind where the computer towers will be located, with the goal of sucking the heat from the towers right out of the room.

I didn't take a picture, because we all kind of know what a floor vent looks like. So next weekend we move INTO THE STUDIO!

We'll be doing an inventory as we go and dusting and cleaning gear before it moves in.  I'll also be labeling things along the way for clarity. If I don't need it, it doesn't move in. Plain and simple.

The door isn't 100% finished as of yet, I had to spend some money for marketing material and that overruled the cost of the cooler handle.  The studio is self funded, so we'll get there.  It's been a busy week for scripts, so it won't take long.  Stay Tuned.

Wednesday, July 25, 2012

Update

Slight pause in the work due to performances with Nutshell Playhouse and rehearsals for The Merry Wives of Windsor in which I'm playing Falstaff.

Then there's a darn vacation on the lake planned!

Have no fear, we'll finish soon...

Thursday, July 5, 2012

Studio Build 24

Alright! we got that rear space diffuser and sound absorption panel finished and INSTALLED!  That thing was heavy so not only is there the French cleat on the top, but we added a bottom support bracket to hold some of the weight as well.  The stain is "Gunstock" and it came out a bit more orange/red than expected, but it fits the room perfectly.

  and here is how the staggered heights of the slats look.


Thanks again to the late great Mike Sommer for designing this panel.  I've brought the rocket lamp into the room and put it on the floor, and I have to admit, it needs to fly from the ceiling..  So that's what we're going to do.  Reinstall the bracket it came with, since it was a theater fixture, and bolt it to the ceiling.

Here it is on the floor.  Just so you can see it in the space.


I know I know.. it's an iPhone camera, I'll be getting the real beauty shots soon once things are all moved in.

So next, we are adding a return air vent to keep the room cool/warm.  Initially I wasn't going to, but I'll pick up some more quiet ductwork and run a feed to the return duct in the basement.  The collector will be situated right behind where the computers are located, so hopefully it will pull some of their waste heat out of the space as well.  Then I drop in a neutral rug and start dragging gear into the space!

WOOO!

Monday, June 25, 2012

Studio Build 23

Some good work done this weekend. The wall that will be behind me as I'm seated at the mix desk will have a combination of an acoustic panel and a space array. A series of slats that will act to scatter and break up a sound wave.

The slats are created out of 2x4, which are actually only 1 1/2" wide, and they are going to be spaced 1 1/2" apart. They vary in height from 1 1/8 to 1 1/2 to 1 7/8" and then repeat. They will cover the entire 97" of the wall panel.


and for a close up of the heights.  The 2x4's were ripped down on the table saw, sanded and then stained.  The color said "Gunstock" but it came out more like a red mahogany.  Still nice!


I hope to get these hung this week, but it's a two person job lifting the panel safely, so we'll see who's around this week to lend a hand, else I'll have to wait till Friday.
_________________

Thursday, June 21, 2012

Studio Build 22

Real quick update.  I salvaged a couple of Kleig Brothers theater lights and had the idea to create a rocket theme lamp for the studio.

I know, I know...get back to work monkey boy... but I was waiting for another machine to finish a render!

I designed the rocket fins in Illustrator.

Printed that out on a couple pieces of paper and transferred that to a piece of scrap plywood.  Cut it out on the bandsaw, and duplicated that 3 more times for 4 fins.   Sanded down the rough edges and used "Rub and Buff" to give it a bronze finish.

Drilled some holes in the housing.  (I had already gutted the housing and installed a new bulb fixture with switch)

and Voila!

 We have ignition!

More work on the rear space array/panel on Friday night....

Monday, June 18, 2012

Studio Build 21

We stripped the roof, laid down some ice and water shield, felt roofing and new 25 year shingles.

What a great weekend!  No one got hurt, the roof installation went great and looks fantastic.  We also picked up the material to finish the slats on the rear absorption panel.

quick update and onward!

(oh the Mac-Haydn Theater wants me in a production of State Fair in August...I'll finish my studio eventually!  WEEE!)


Friday, June 15, 2012

Studio Build 20

This is a quick update.  No pictures yet because it just doesn't look like much got done, BUT IT DID.

The second ceiling cloud is up, and having TWO people to hang it was a lot easier than me swinging it up there myself.  (Thank you Cathy!)

Also the back wall sound absorption panel is up, and most of the space array slats are cut.  They are pieces of 2x4 that are ripped down to 1 7/8, 1 1/2 and 1 1/8 of an inch and spaced an inch and a half apart.  In a repeating pattern to cover the entire panel.

I'll lightly sand the ripped pieces, then stain them a cherry red.  Right now the room is so full of burlap brown that it needs splashes of color.

More work this weekend, (I have roof project to do first though) and pictures will be coming.  We're on the home stretch!

Tuesday, June 5, 2012

Diversion!

Ok, I've been doing a lot of video editing, and while things load, render, render, load, transfer....

I have some time on my hands.

So I built a Lightsaber.

See the full Instructable here

I think it came out pretty badass, and will find a home in the new studio!

Monday, June 4, 2012

Studio Build 19

Oy, between rehearsals for this, commencement for that, reunion for them...
and installing a fence in the back yard to keep Bumbles from bothering poor little Peaches..
Back to work!

So the ceiling clouds are hung on hooks with eye bolts threaded into the joists. Which in itself was a lot of fun as the ceiling joists in this room run two different directions due to the house design.  So finding the one joist, then locating the perpendicular joists, while keeping the measurements together so that the hooks line up.  Joy!

The hooks go through the back support, and through the insulation. The cloud doesn't weigh too much.


Here is the back of the cloud prior to hanging.


I hung it by myself.. that was FUN! (not) But here is the first one up and done.


Very satisfying... during the day, while I'm waiting for things to render on one computer... I've been playing with some junk on the workbench. I have to admit. I'm a geek. I'm building a lightsaber.

http://www.therpf.com/f9/trashsaber-149679/

Smile

Monday, May 21, 2012

Studio Build 18


Just a quick update as we're simply moving along with more acoustic panels.

On Sunday I built the two ceiling clouds,  they are stacked on the floor...


I'll cover them with burlap tonight and get them hung.

Then I created a panel to cover the ugly window plug.  The Burlap is only 5 foot wide, so there's a strip to cover the seam.  It kind of looks like modern art.  I think I'll stain that strip a nice deep cherry red.


and then the large piece that will cover the back wall.  This is the rough frame with insulation.  It still needs the screws and washers to keep the insulation in place when moving things about.


Which will get covered with fabric and then a series of 1/2" pieces of wood to create a sort of space array.  Like this...


So the room is shaping up to look like this,


Closer and closer! And already with pieces in place the room sounds great! 

Saturday, May 12, 2012

Studio Build 17


Some more details with the frame building, these are the washers and screws to make sure the insulation doesn't fall out.


and then how I use push-pins to hold the print while I line it up and make sure there are no puckers.


Then around the edge with staples.  I have to admit, having the right tools, no matter what you're doing, is a wonderful thing...  (that also means gear!  good pro microphone, decent software...)

Here is the wall portion of the french cleat, it makes it real easy to hang these things, and once they're up, it feels solid.


And finally, the whole thing mounted and hung on the wall.


I have to run to a rehearsal for a library benefit, and it's such a beautiful day, that requires a motorcycle ride, and that requires taking the long way, so that required me to clean up early... :)  I'll get more done tomorrow after having lunch with Mum. 

Have a happy Mother's Day one and all!

Tuesday, May 8, 2012

Studio Build 16


Ok, it's been a whirlwind of a weekend, I auditioned for Falstaff in the Merry Wives of Windsor on Saturday.  Nailed the audition with the monologue and on Sunday had rehearsal for a benefit show... (found out Monday night I got the part!)

So work was catch as you can.  But I did get the frame for the large panel behind the mix desk built!  This one will get covered with an art print that I had ATS Acoustics print out at 4'x8'.

Here you can see the panel and how the 24"x48" Roxul fits in.


and here is a detail of how the frame is assembled, complete with "french cleat" on the back.


and back to one of Mike's images for clarification:


Then I secured the insulation to the cleat and a bottom brace by running a screw through the insulation and with a washer to keep it from pulling through.  I forgot to take a picture, but I'll get one that clarifies.

From there, stretch the fabric over the frame and hold in place temporarily with push pins until I got it right.  Then pneumatic staples all around the edge.  The other half of the French cleat is mounted on the wall, 5" from the ceiling and catches the 45 degree angle perfectly for a solid mount. 


and there it is!  This is what I'll be above the monitors and behind the nearfields.  And this print will get mounted the same way to the left of the mix desk.  The images are the work of Bradley W. Schenck from his Retropolis series.  Way cool stuff, and the vibe I was hoping for.


That will be Thursday evening at the earliest, maybe Wednesday, we'll see.  Then a couple of more panels, a door latch, rug, and we can think about moving some gear in!

WOO!

Monday, April 30, 2012

Studio Build 15

It was a great weekend!  Got the window plug finished and installed.  The window is a 3x5 Anderson window, and I was able to pick up a 3x5 sheet of tile backer.  Some minor trimming, some GreenGlue® and a couple of handles, and voila!  Solid window plug.

What you're seeing there is the window side of the plug.  The fabric is only there to make it look better from the outside looking in.  VS seeing a couple of sheets of tile backer board.

Here it is installed.

It was a windy afternoon on Sunday, and once the plug was installed.  You couldn't hear it at all.  No daylight or sound sneaking through.  The handles are essential, as it's the only way to get a grip on the plug once installed.

Then we got started on the "Superchunk" corner bass traps.  We took a full 24"x48" sheet of Roxul cut it in half, then quarter it.  Our tool of choice was a nice Sabatier knife.  Kept a great edge and made quick work as we cut the material. 


and then you can see how they stack in the corner.


And you stack it right up to the ceiling!


 Then I was able to build up some frames real quick. 


And then cover the frame with some landscaping burlap.  This is one layer, I'm going to do two layers total.

and a close up..

Not bad, but one more layer will give it the look I want.
That's it so far!  We'll keep going.

On another front, we're upgrading the computer system from my G4 to an Intel Mac with 16 Gigs of RAM and ProTools 10.  ya baby.

Thursday, April 26, 2012

Studio Build 14

I got most of the window plug built last night, I thought I had enough material, but was fooled by a partial sheet of Durock® tile backer.  So I'll have to wait for the weekend to do a run to the supply store and grab a sheet.

Here's the overall design of the window plug;
and here's a detail of the layering;


The handles are a necessity! This thing weighs a ton and once it press fits into the window space, there's no way to pull it back out again without the handles.  Ask me how I know.

When I cut the inner plywood piece, I left a 1/4" gap all the way around as that would allow the felt to fill in and squish for a tight seal.  The tile backer board is inboard of the plywood by 1/2" and seated on a bedding of GreenGlue.

Tonight the plan is to bring in some Roxul and start cutting things up to lay into corners!  Here's a few sketches from Mike Sommer, the designer of the space.

and here is how to cut the insulation
I'll keep ya posted!

Monday, April 23, 2012

Studio Build 13

Nothing like trim.

before the trim was installed, all seals were sealed with SilentSeal®.

The window is going to be plugged.  Basically a tight fitting panel that will block out the window and the noise sneaking in around it.  The window is an older Anderson, and Mike Sommer, the room designer suggested removing the window.  But I have to think about resale of the house.  Our last house was very custom for us and it took a while to find the right buyer.  So the window stayed and we'll create a thick panel that will cover the space.

Just a couple of notes about doing construction and renovation work.  Work clean.  When you're done with a tool, put it away.  Having a clear workspace prevents accidents and damage.  I even like vacuuming up after a day of work.  It makes the next day easier.

I have to finish the gaskets on the door, there are two more layers to do.  And I'm waiting another day or so before buying the latch assembly.  I can start to think about bringing in some Roxul!

Friday, April 20, 2012

Studio Build 12

Floor is in!

It's a Pergo laminated floor that floats on the felt underlayment.  I had initially bought this flooring for some upstairs bedrooms, but decided I didn't like the feel of it.  Now, it's just me really, this stuff is great.  We have it in our living room and it has taken all of the abuse that dogs, guests, construction.. you name it has thrown at it.

It looks great, is easy to install and really works well.  So I'm going to get over my touchy feely complaints about it and learn to love it.  Next is trim work and replacing the outlets with some fresh ones.  Something about clean outlets and new covers, plus there's a gasket that goes behind the plate to further seal the outlet from the outside intrusion of noise... mass, air, mass air...

Oh, what's cool is when the door closes now, it has that "shhoooooommmph" sound.  Like a studio door.  :P

Thursday, April 19, 2012

Reality Check

Who pays a reality check?  Just curious.


Paul Strikwerda just wrote a great piece on his blog about building or having a home studio.  It's a great reality check for people thinking about doing VO work and toying with the idea of "how hard can it be" to do at home.

I tell people it's a rabbit hole.  To to VO work, you need to be able to act well, connect with the copy and connect with the target audience.  Blah blah blah.  If you have researched this field, you know that and have heard that.  (If you do something about it, like get a good coach, then bravo!)

Then you buy a microphone, and connect it to a recording device.  This has come a LONG way!  My first setup to record onto a computer had an external 1Gig hard drive that cost me a THOUSAND dollars.  Sheesh!  I want that thousand back!  Hey, I'm not that old, it was only 20 years ago and I was using E-Magic Logic 1.5...

Anyhoo.  Back to that microphone.  If you're starting out, are you going to buy a three thousand dollar Neumann u87 and plop it onto the kitchen table and wonder where to plug it into your machine?  No.  At least I hope not.  You start easy, a Shure SM7 or Electrovoice RE-20 and an M-box was a good start.  Now you can use an Audio Technica with a USB output that sounds pretty nice. (pretty nice)

Then, you start hearing things.  Things that creep into your headphones.  Fish tank, refrigerator, neighbors kids in the yard, that DAMN LEAF BLOWER.  Ok ok, so you wait till after 8 to knock out those scripts.  But then you listen deeper.  There's a ring in the sound or a hollow echo... now what?

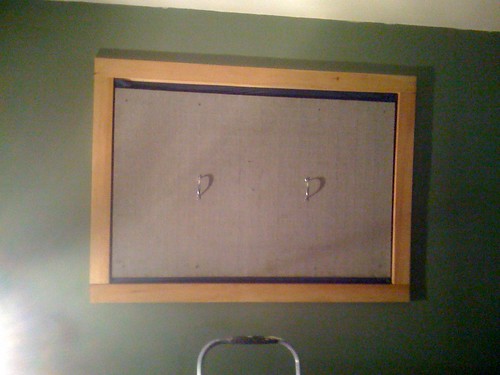
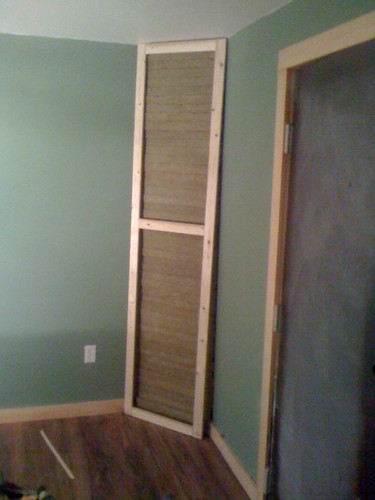
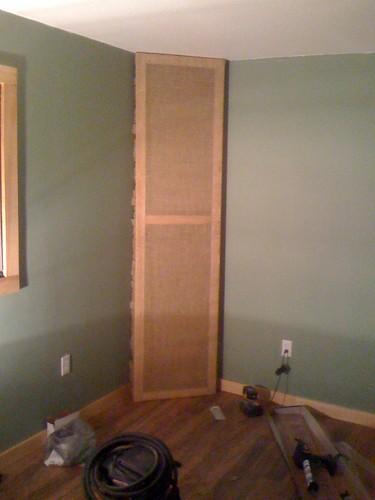
You start hearing things about Room Treatment and you hear about this wonderful company called Auralex and wonder if some foam on the wall will help.  (it will)

You may land a gig, get a few complements and think about that new condo in Boca. 

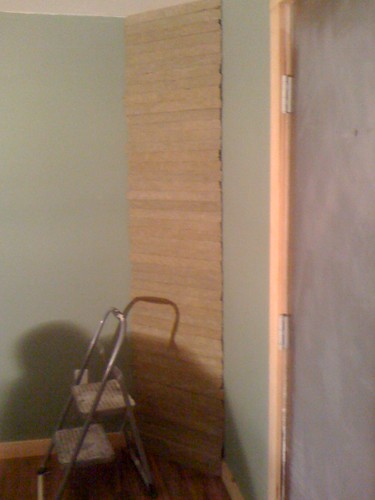
Now, here's the dividing point.  Do you A. go and introduce yourself to all of the cool studios in your city or town within reasonable walking and driving distance, demo in hand.  Or do you B. think about improving your gear to something more professional and buffing out that room in the basement? (or C, BOTH!)

Here's the reality check and where Paul's  blog post is so helpful.  Know your limits.  I had a musician friend that got an M-box and ProTools LE.  She knew nothing about engineering.  Nothing.  The learning curve, to me, isn't hard, but I also know that I can not play guitar.  C chord?  nope, can't find it, can't remember it, don't try to teach me.  Editing in ProTools?  I do it in my sleep.  (Final Cut as well, but that's a different subject.)

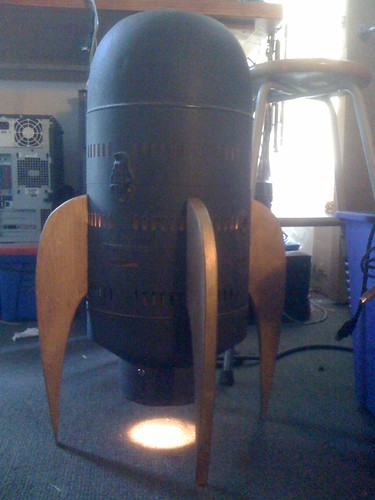
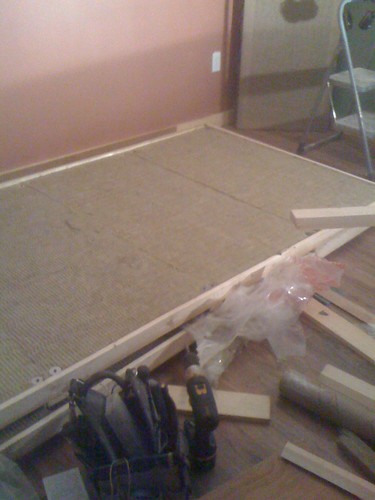
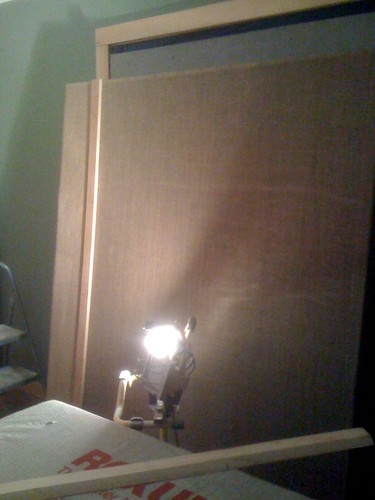
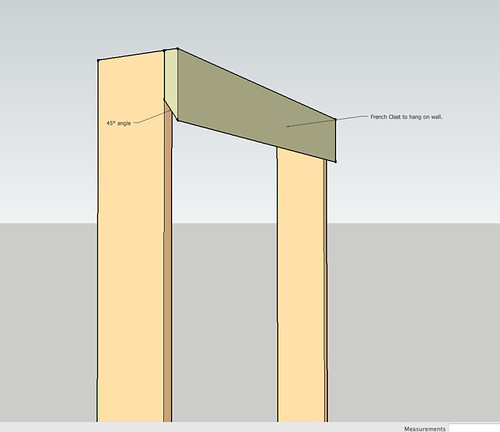
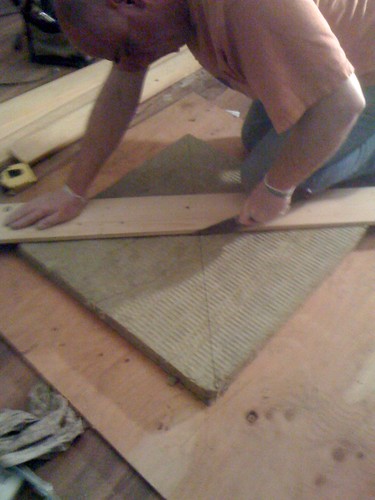
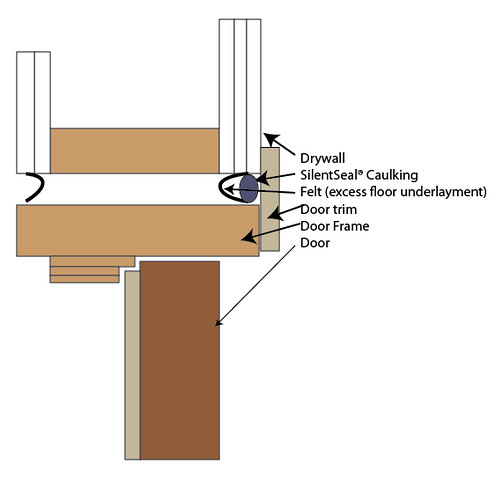
If you are not handy with tools.  Don't try to build a booth or studio.  Hire someone who has done it.  It's not rocket surgery, but it's different than building a bathroom.  If you know nothing about audio engineering or editing, get training or have someone else do it.  You will save yourself HOURS of stress.  Once again, it's not hard, it just isn't something you're born knowing.  If programing the DVR gives you fits, you may want to really focus on being in a town with a couple studios that you can visit.

So, it's more than reading into a microphone.  Especially if you're going to try  it at home, you end up being talent, engineer, CEO, CFO, the marketing department, sales and billing...

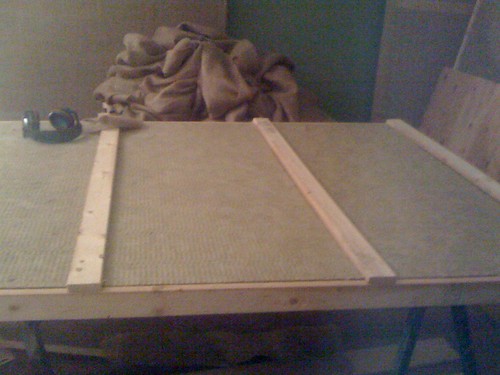
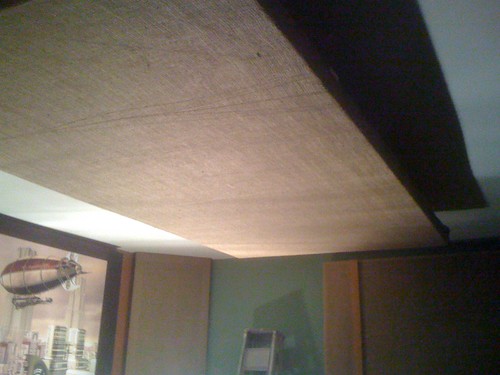
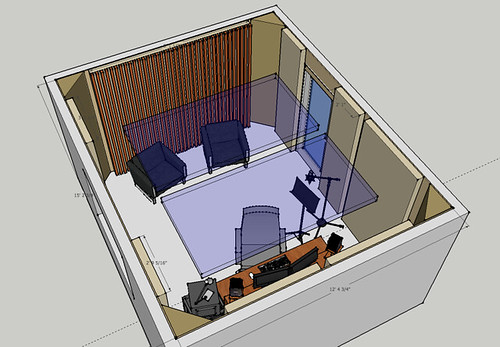
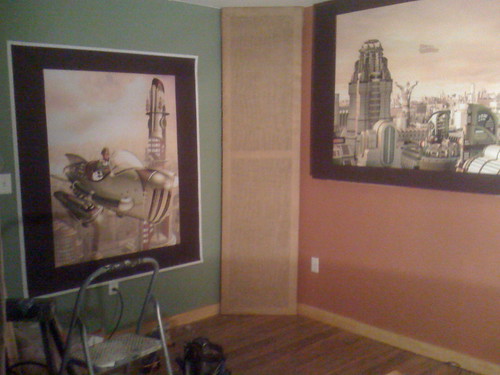
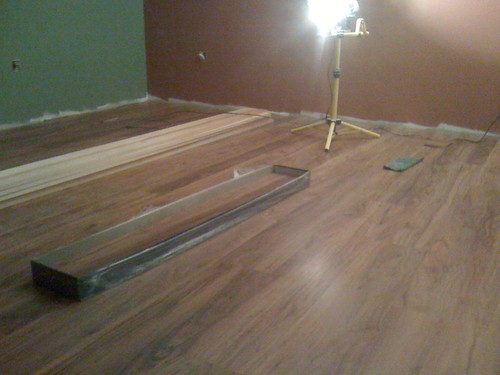
This can be a fun and rewarding career.  I've done great eLearning work, national commercial work and all sorts of projects before I started this studio build out.  For me, this is about kicking it up to the next level and creating a space that I can produce consistently solid sounding work.  Think audiobook.  Hours of recording that sounds clean and a space that is easy to work and edit in.

Yet even I know to hand off the billing to my accountant.  :)

Wednesday, April 18, 2012

Studio Build 11

It goes up to eleven...

Last night I was able to really clean up the floor while the poly on the door dried.  Smoothed things out and layed down the felt underlayment.


with the leftover felt, I was able to fill the gap between the door frame and the studwall.  This picture isn't really clear...


but here's an overhead diagram of how it all works out.  The felt will get covered by SilentSeal® caulking just prior to the trim board being placed over it.

If all goes well this evening, I'll get the floor laid down, it's a floating laminate floor and drops in pretty quickly.  Then trim!

I did an initial reading with my iPhone dB meter, and it read 36dB average.  So far so good.